

Get Compression Socks On in Under a Minute for Wide Calves
The easiest way to put on compression socks is the inside-out roll: turn the sock inside out to the heel, slide your foot in, set the heel, then unroll the fabric up your leg in short sections rather than yanking it up in one pull. Do it first thing in the morning, before your legs swell, and if your hands tire easily, a pair of rubber gloves or a stocking donner makes the job much easier. Wide-calf styles with extra stretch can also cut down on the struggle considerably.
TL;DR:
- Proper fitting and timing are critical, so always put on compression socks in the morning before swelling increases for best comfort and effectiveness.
- Using sectioned unrolling techniques and assistance tools like gloves or a stocking donner greatly simplifies donning, especially for wider calves or limited hand strength.
- Correctly seated heels and flat top edges are essential to avoid bunching, uneven pressure, or slipping, which can compromise the sock’s therapeutic benefits.
- Worn-out socks lose their elasticity and should be replaced once they show thinning or lose their snug fit to maintain proper compression levels.
- Movira’s wide-calf bamboo compression socks are designed to fit calves up to 25 inches, offering easier donning with extra stretch and a 60-day fit guarantee.
Table of Contents
- The Basic Method: Step-By-Step Instructions
- Common Mistakes That Ruin the Fit
- When Should You Put Compression Socks On?
- Donning Aids That Make the Job Easier
- How to Remove and Care for Your Socks
- Why Movira Focuses on Fit for Wider Calves
- A Quick Note From the Movira Team
- Try Movira’s Wide-Calf Bamboo Compression Socks
- Sources
- FAQ
The Basic Method: Step-By-Step Instructions
Getting the technique right matters more than strength or speed. Once your hands learn the motion, the whole process takes under a minute.
Before you start:
- Sit down in a stable chair with good light. Trying to do this standing, or half awake in the dark, is how socks end up twisted or torn.
- Dry your legs completely. Lotion or damp skin makes bamboo and other stretch fabrics grip and bunch instead of glide.
- Take off rings or anything on your fingers that could snag the fabric.
- Check the sock’s size label and confirm which one goes on which foot if the pair is shaped.
Method A: inside-out roll (works for most people)
- Reach into the sock and turn it inside out down to the heel, so you’re left holding a fabric “cup” with the heel pocket visible.
- Slip your toes and foot in first, then settle your heel firmly into the heel pocket. This step is where alignment gets decided, so take your time.
- Grip the fabric with both hands and unroll it up your ankle in short, even sections, an inch or two at a time, rather than pulling from the top edge in one long stretch.
- Keep unrolling past your calf until the top sits where it should, usually two or three fingers below the knee.
Method B: heel-first hand positioning (good for firmer knit styles)
-
Instead of rolling the sock inside out, reach inside it with one hand, pinch the heel pocket from within, and guide it directly onto your heel before pulling the leg portion up.
-
Once the sock is on, smooth out any wrinkles or bunching, especially around the ankle and behind the knee, and check that the seam runs straight up the back of your leg. A twisted seam usually means the graduated compression isn’t distributing the way it’s designed to.
-
Leave the top band exactly as it comes off the roll. Do not fold it down, even if it feels loose. Folding it changes how pressure sits on the leg, and it tends to create a tight band right where you folded it, according to donning guidance from Sigvaris.
If you’re working with a wider calf, start the unrolling in smaller increments than you think you need. Wide-calf fabric has more stretch built in, which is a relief once it’s on, but it also means the material wants to move faster than your hands can track it. Slow, half-inch pulls beat fast, full-hand yanks almost every time.
Common Mistakes That Ruin the Fit
Most donning problems trace back to one of a handful of habits. Fixing them is usually a two-second adjustment, not a bigger sizing issue.
- Pulling from the top band instead of the body of the sock stretches that one section of fabric unevenly, which can leave a tight ring at the top and looser compression everywhere else.
- Deep marks, throbbing, or numbness after wearing them means the sock is either too small or the compression level is stronger than you need. Take them off and reassess before wearing them again.
- Bunching at the ankle or slow rolling down the leg usually means the heel wasn’t seated correctly. Reposition it and re-smooth in small sections rather than tugging the whole sock back into place.
- Limited grip strength or hand mobility makes gloves or a stocking donner worth using every time, and asking a family member to help with the last pull is a completely normal solution.
Pro Tip: If a sock feels impossible to get past your ankle, stop and check that it isn’t inside-out in the wrong direction. That single mix-up accounts for a surprising number of “these don’t fit” moments.
When Should You Put Compression Socks On?
Morning is the answer, ideally before you’ve even swung your legs out of bed. Clinicians at Kaiser Permanente point out that legs are at their least swollen first thing in the morning, which makes the fabric slide on with far less resistance than it will by midafternoon.
Once they’re on, run through a quick fit check:
- The ankle should feel snugger than the calf. That’s the graduated compression working the way it’s supposed to.
- Pressure should ease gradually as it moves up your leg, not stay uniform or spike partway up.
- The heel pocket sits centered under your actual heel, not shifted to one side.
- The top edge lies flat against your skin, never folded or rolled.
Persistent discomfort, deep indentations that don’t fade within a few minutes, or a sock that keeps slipping despite a correct size are signs worth raising with a provider. For daily comfort, many people do fine with lighter pressure in the 8 to 15 mmHg range, while stronger compression levels are typically reserved for specific needs and chosen with a provider’s input, according to the Cleveland Clinic.
Donning Aids That Make the Job Easier
You don’t need to muscle through this every morning. A few low-cost tools solve most of the friction.
- A stocking donner, a rigid frame you slide the sock over before stepping in, is a real help if arthritis or limited hand strength makes gripping fabric painful.
- Plain rubber kitchen gloves add grip when your hands slide on the fabric, which is a widely recommended trick from sources like wikiHow.
- A plastic bag over your foot works like a slipper, letting the sock glide past your heel before you pull it snug.
- Long-handled reachers are a last resort for anyone with limited bending range, but check your grip on the fabric before committing to a full pull, since fumbling partway through can twist the sock.
Whatever aid you use, avoid metal edges or anything rough near your skin, and pair gentler tools with wide-calf styles so you’re not putting extra stress on stretch fabric that’s already working hard to fit comfortably.
How to Remove and Care for Your Socks
Taking them off correctly matters almost as much as putting them on, since rough removal stretches the elastic unevenly over time.
- Fold the sock down from the top edge to your ankle, working in the same short sections you used going on.
- Once you reach the heel, hook a finger or thumb under the heel pocket and pop it free.
- Slide the rest off slowly rather than yanking, especially over the ankle bone.
- Hand wash in cool water with a mild detergent, or use a gentle machine cycle if the label allows it, then air dry flat. Heat from a dryer and harsh detergents or bleach break down the elastic fibers that give the sock its compression, shortening how long they hold their fit.
- Replace socks once you notice visible thinning, loss of stretch, or a top band that no longer sits snug. Worn-out elastic stops delivering consistent pressure even if the sock still looks fine.
Why Movira Focuses on Fit for Wider Calves
Standard compression socks are built around a narrower calf range, which is exactly why so many women end up fighting the fabric every morning. Movira’s bamboo wide-calf compression socks are cut in sizes L through 4XL and built to fit calves up to 25 inches, with a super-stretch bamboo blend designed to stay put without digging in or sliding down through the day.
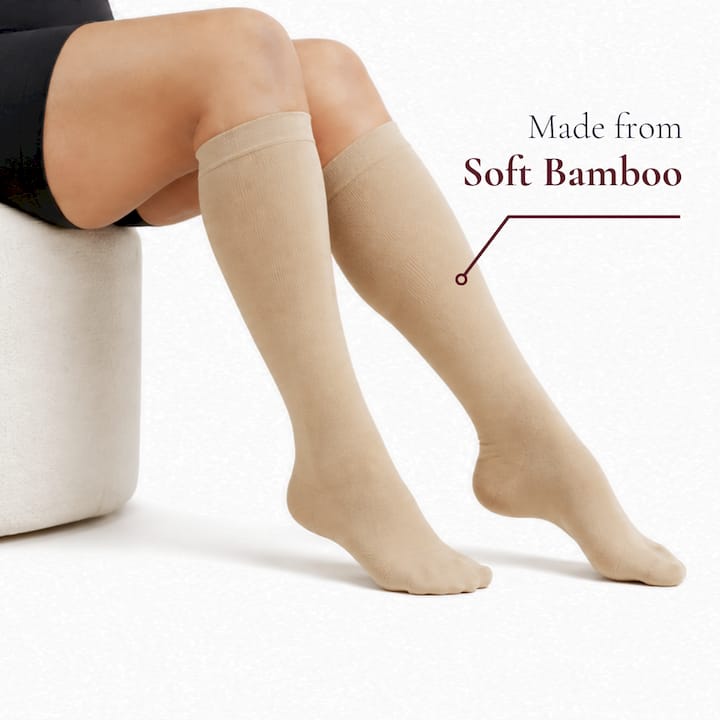
They’re made for everyday comfort in the 15 to 20 mmHg range that many people find comfortable for daily wear, not as a medical or prescription device. If you’ve been told you need a specific medical-grade compression level, check with your provider before choosing a pair. Every order comes with a 60-day fit guarantee, and the wide-calf collection includes a size guide to help you land on the right fit the first time.
A Quick Note From the Movira Team
We hear the same frustration constantly from women with wider calves: socks that either won’t go past the ankle or roll down within an hour. Our fit testers found the inside-out roll method paired with a slower, sectioned pull solved most of that friction. If you’re still stuck between sizes, reach out to our fit support team before you order.
— Movira Team
Try Movira’s Wide-Calf Bamboo Compression Socks
If mornings keep turning into a wrestling match with fabric that’s too narrow for your leg, the fix usually isn’t technique. It’s the sock. Movira’s bamboo wide-calf compression socks run L through 4XL, fit calves up to 25 inches, and use a soft, breathable bamboo blend built to stay in place without digging in or rolling down by lunchtime.
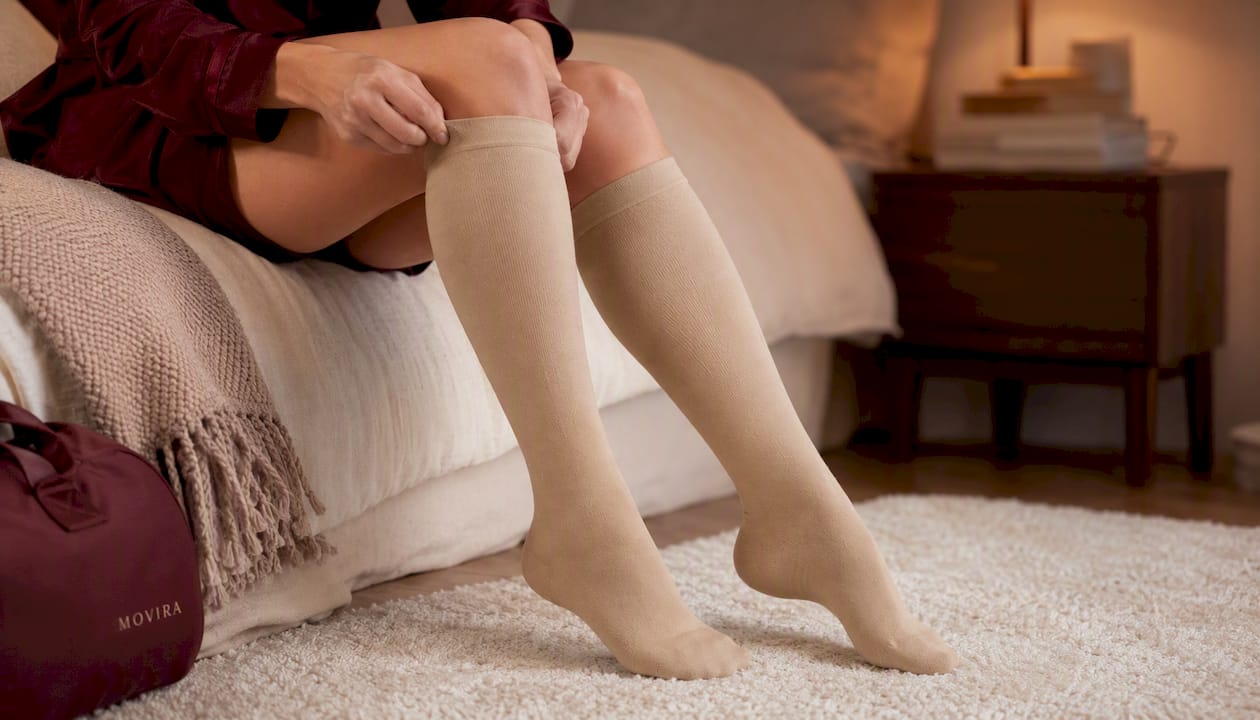
That extra stretch is what makes the donning steps above actually easy instead of theoretical. Less resistance going on means less bunching, less sliding, and a lot less time spent readjusting mid-morning. Every pair ships with a 60-day fit guarantee, so if the fit isn’t right, you have room to send them back. Check the wide-calf compression sock collection for the full size guide, find your measurement, and order the pair built for your actual leg, not an average one.
Sources
- How to Put On Compression Stockings | Kaiser Permanente Health Article
- Mayo Clinic Q and A: Tips for using compression stockings
- What you should know about compression socks | Cleveland Clinic
FAQ
How Tight Should Compression Socks Feel?
They should feel firm and snug at the ankle, gradually loosening as the fabric moves up your calf. If the pressure feels equal all the way up, or tighter at the calf than the ankle, the sock likely isn’t fitted correctly.
Should Compression Socks Be Tight Enough to Leave Marks?
Mild, temporary skin lines that fade within a few minutes are normal, but deep indentations, numbness, or lasting marks mean the sock is too tight or the wrong size. Try a wider size, like Movira’s bamboo wide-calf styles, or a lower compression level.
What’s the Easiest Way to Put On Compression Socks?
Turn the sock inside out to the heel, seat your heel into the pocket, then unroll the fabric up your leg in short sections rather than pulling from the top in one motion. Doing this in the morning, before swelling sets in, makes the whole process noticeably easier.
Can Compression Socks Cut Off Circulation?
A properly sized sock is designed to apply graduated pressure, not restrict circulation, but a sock that’s too small or rolled at the top can create an uneven, tight band that feels like restricted blood flow. Remove it and reassess sizing if you notice numbness, tingling, or lasting discomfort.
What Tools Help If I Have Trouble Donning Compression Socks?
Rubber gloves for grip, a rigid stocking donner for arthritis or limited hand strength, and even a plastic bag over the foot to help the sock glide on are all common, low-cost aids. Pair these tools with a wide-calf fabric that already has extra stretch, since it reduces how much force you need in the first place.
Recommended
- 5 Reasons Why Women Are Switching to these Compression Socks
- Movira Bamboo Wide-Calf Compression Socks | L–4XL
- Tried Every Compression Sock
This article is for general information and fit/comfort guidance only. It is not medical advice. Movira socks are everyday comfort products, not a medical or prescription device.
Tags:
Previous
Compression Sock Sizing for Wide Calves Up to 25 Inches
Next
Stop Digging In: How Long to Wear Compression Socks for Wide Calves
Related articles
Compression Leggings vs Socks: What to Wear
Nov 20 2026
Zipper Compression Socks Problems: What to Know
Nov 20 2026

Compression Levels Explained for Everyday Wear
Nov 20 2026

Graduated Compression for Wide Calves: Daily Use
Nov 17 2026

Tight Socks? How to Find a Comfortable Fit
Nov 17 2026
Light Compression Socks for Women: When to Wear
Nov 15 2026

Knee High Socks for Wide Calves: How to Choose
Nov 14 2026
Wide Calf Compression Guide: Find Your Fit
Nov 13 2026